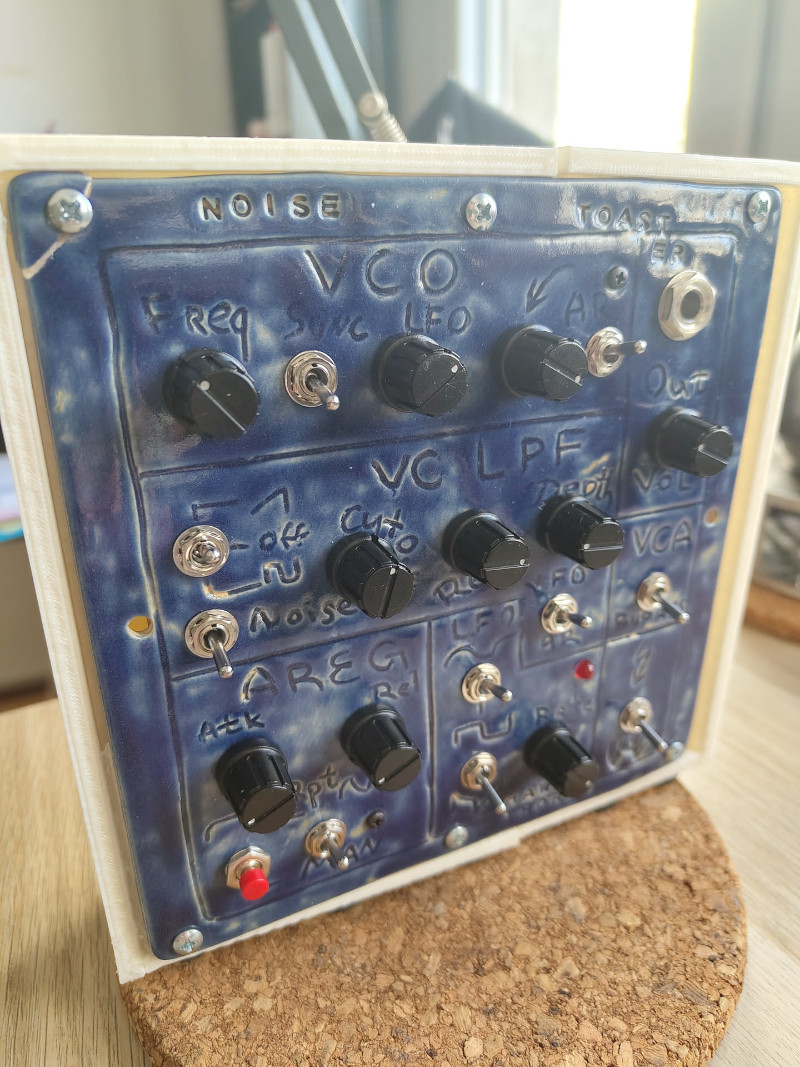
This hand-crafted device combines all the crafting madskills that I possess: average soldering and 3d-printing and beginner ceramics and sound engineering. As with many works of art, many times it could've gone sideways, but somehow it's here: assembled, functional and sound.
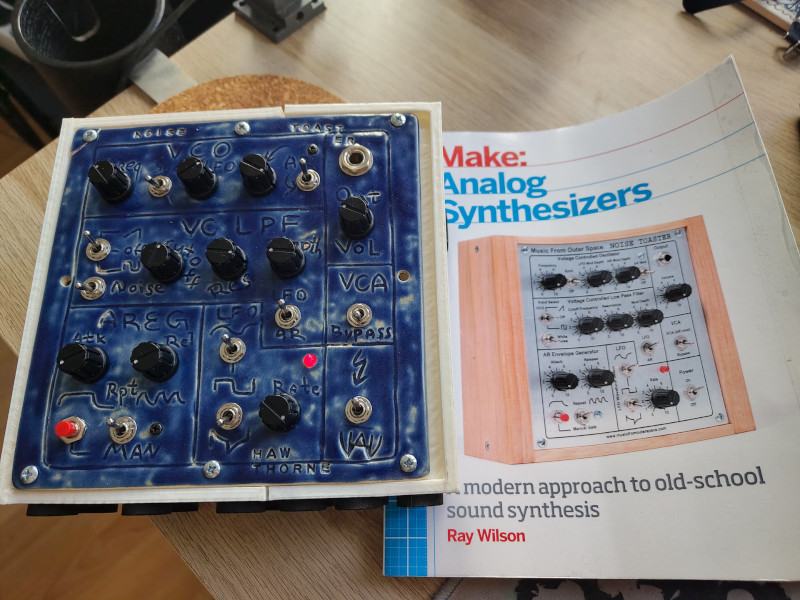
The core of the project is Music From Outer Space - Noise Toaster DIY analog synthesizer designed by Ray Wilson. First I got his book of course which Reddit lists among the textbooks for wannabe synth-hobbyists. And after spending some time with other synths I decided to go in-depth and order a kit for Noise Toaster - a central device of the book, and a beginners' entry point among Ray's open synth designs.
However, assembling it all from the kit seemed a bit dull. Besides, the US tariffs have hit at the time. And thus I got an idea: I'd order an incomplete kit (electronic components and PCB), but the box will be 3d-printed. And the front panel I'd hand-craft.. from ceramics!
Lickily, @Katerisa - the owner of our friendly ceramics studio -
supports crazy ideas of her students! But in order to succeed, a
thorough preparation had to be peformed.
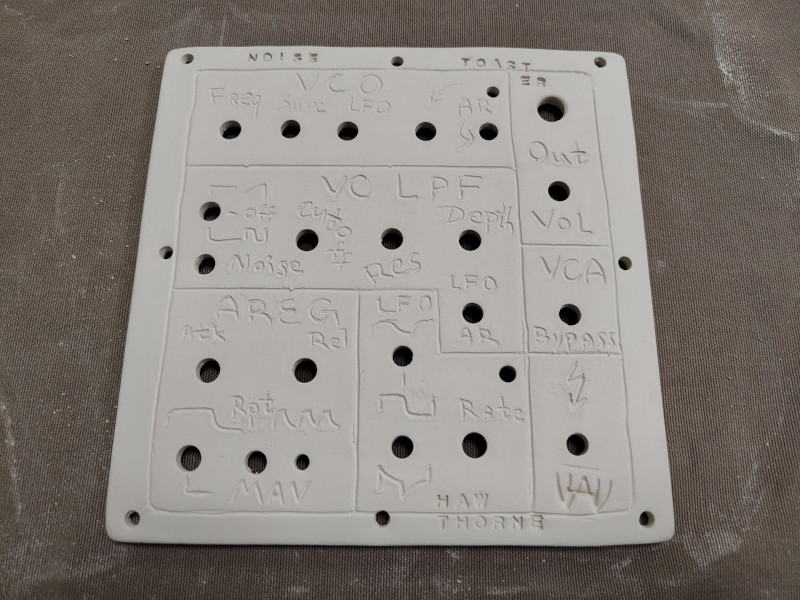
I've made the front panel from a layer of white clay ~4mm thick. The
shrinkage of that specific clay was estimated first via test rulers
annealed at the operation temperatures. A coefficient of 1.08 was then
applied to the 1:1 scale front panel blueprint (provided on the
Noise Toaster webpage). The stretched blueprint I've printed out and
transferred onto the clay layer somewhat.. artistically :)
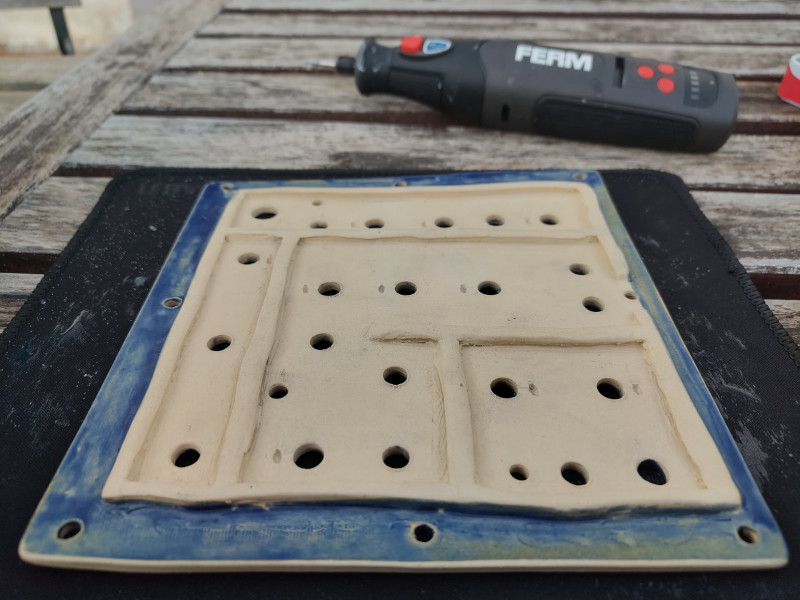
On the back of the plate stiffeners were added. They only seemed out of place at start, but actually played a crucial role in the project. Their importance was obvious after the two anneals (one before and one after glazing), when the plate came out a bit deformed after each annealing. These deformations are caused by internal tensions within the clay fibers that bend the layer during anneaing. On my plate the deformation is visible, despite in the end it did not interfere much. I think this is mostly because of the stiffeners.
Dimentions were guessed quite well. Even the potentiometer holes came out plecise - I only had to extend only like, half of them). The stands for the PCB have some tolerance for it to stick just right in place - wery well.
Extra post-processing included engraving small slots for the lock tabs of the potentiometers. Only later I realized I could've just broken them away. Anyways, with them the potentiometers hold firmly. Plus I got an experience of engraving on the ceramics. Not afraid of the dentist anymore! (The process is better controlled than I thought).
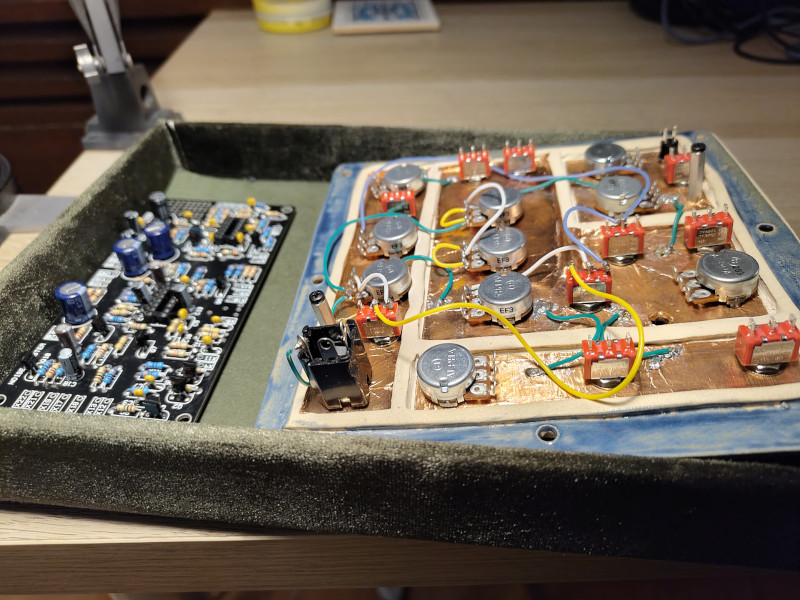
Another extra was adding a layer of copper foil to form a common ground mountpoint for the potentiometers and switches. In case of stock metallic front panel the panel itself becomes a (virtual, in this case) ground potential. But since I made a ceramic one, the foil suited well to form the ground.
The soldering went according to the instructiond in the book and was quite straightforward (if not a bit over the top boring). I threw away a wireless soldering iron in the process and reverted to a vired 30Wt old one, after having destroyed one of the pads on the PCB. I've managed to work around it as a remainder of the contact was visible, but it ended up with a rather huge tin lump right in the middle of the board. Not a big deal in the end, I guess.
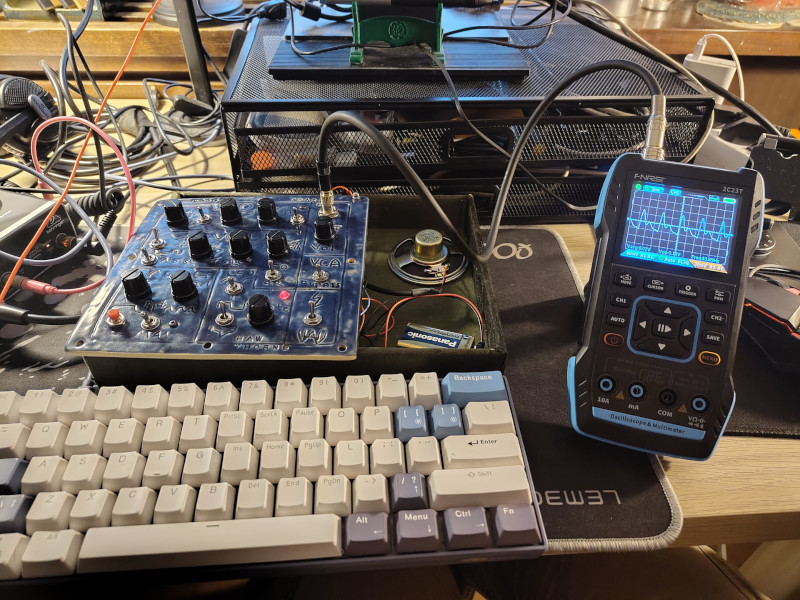
Copies of the synth schematics were coloured with pencils as me and my sister independently checked the connections. And as it came alive, we had plenty of fun inspecting the oscillograms of the sounds it created!
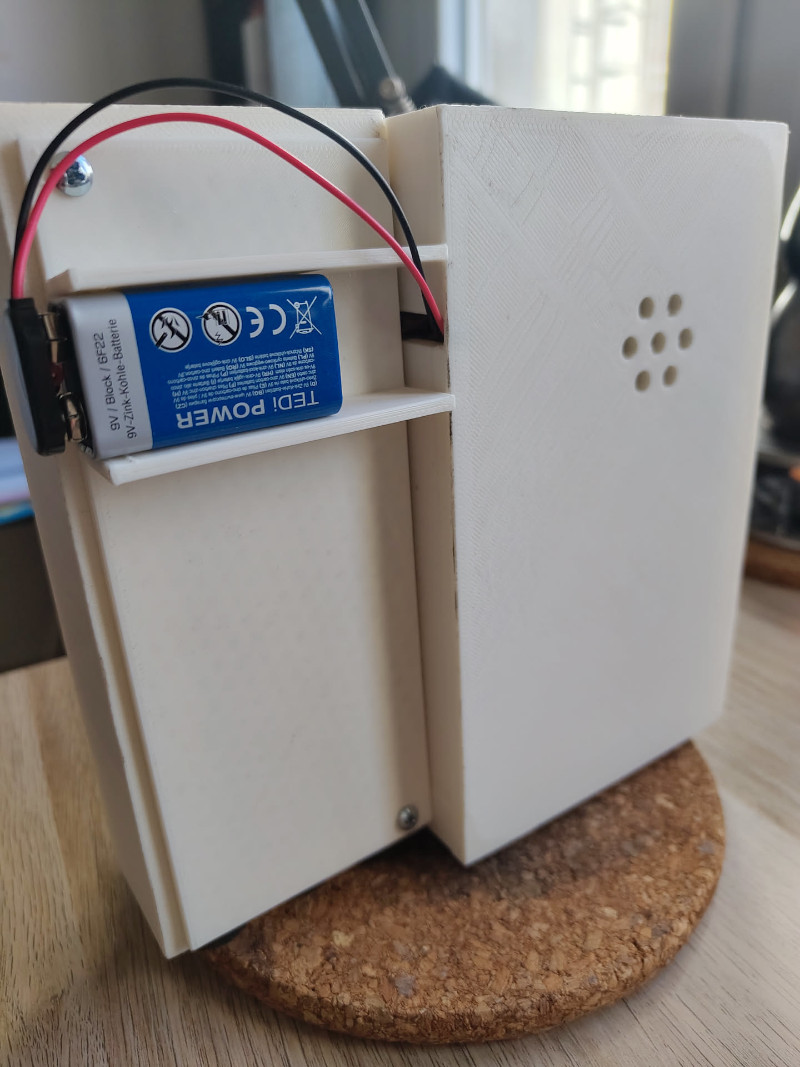
What was left - the case - took me a while to manufacture. I was
procrastinating a lot before installing a CAD. So long that in the end
I freaked out and draw a three-part piece in MagicaCSG. Why several
parts? Because a whole box wouldn't fit in the printing area of my
3d-printer. It took up to 20 hours in total to print the case.
Luckily, for most of the time I could just set the print and go
minding other business...
When mounting the casing to the panel I accidently broke one of the corners.. which was not completely an accident: one of the potential problems I have with the panel is a rather small distance from the mounting screws to the edges. Add to this a curvature, inner tensions and - it cracked! I was lucky the damage was not critical (just one tiny corner), or maybe it was not just luck: once again, the stiffeners on the back of the panel must've played a crucial role in its hardness.
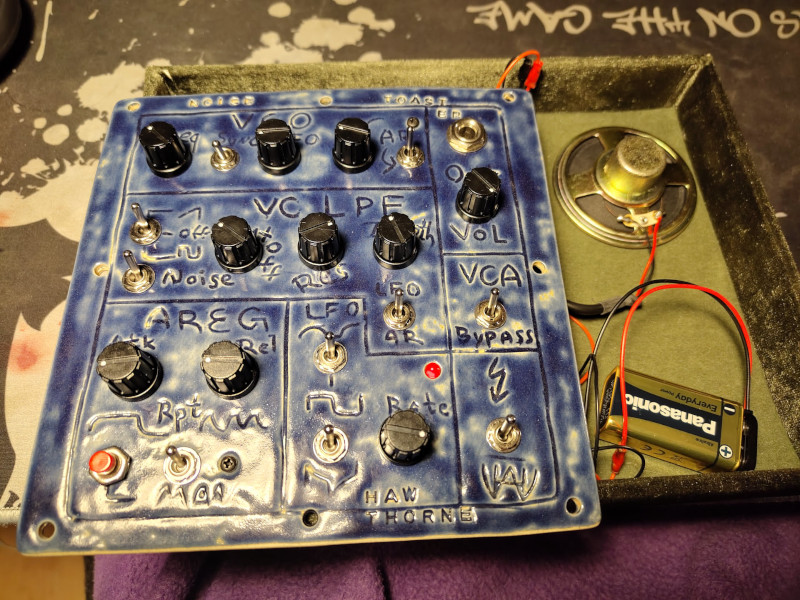
To date it is maybe my most complex project with a lot of nuances. The synth itself is cool: it has only one voice, but distorted with repeating AREG and modulating LFO simultaneously it can sound quite interesting! We've made already a message ringtone for my sister that imitates an owl howling XD. I wanna put it to more use sampling it in pair with a groovebox.
But the most valuable are the detailed descriptions of each of its modules in Ray Wilson's book. He wrote them specifically for this publication - the project webpage with open resources does not include them. And with those notes worked through and the project complete, I'm officially into DIY synths. No turning back.